This game is the Battle of Nasiriyah which fought from March 23 thru April 3rd in 2003. This was during the Invasion of Iraq in the 2nd Gulf war or otherwise known as Operation Iraqi Freedom. The battle was fought between the 2nd Marine Expeditionary Brigade (2nd MEB) aka Task Force Tarawa and the Ba'athist Iraqi forces which included the 11th Iraqi Division and Fedayeen Saddam paramilitary forces. The Iraqi forces did not wear uniforms and disguised themselves as civilians.
The objective of Task Force Tawara's mission was to secure three strategic bridges in An Nasiriyah and provide route security behind the 1st Marine Expeditionary Force (1st MEF) that was protecting the Army's 3rd Infantry division's right flank that was the lead invasion force moving towards Baghdad from the west in the Tigris River Valley. The 1st MEF was moving towards Bagdad from the east in the Tigris River Valley.
 |
| Map of Nasiriyah |
|
|
Marine commanders ordered the 1st MEF to move towards Baghdad along both Hwy 1 and Hwy 7. Task Force Tawara was then ordered to secure the Euphrates River bridge in the southern part of Nasiriyah and the northern Saddam Canal bridge. These bridges are along of Hwy 7 that runs directly through Nasiriyah. The capturing of these bridges would provide a corridor for parts of the Regimental elements of the 1st MEF that were to move along Hwy 7 towards Baghdad.
I being a fellow Marine and fought in Desert Storm, I salute all of my fellow Marines that fought and died in the taking of this city as well as all Marines that fought in any war or battle.
http://en.wikipedia.org/wiki/Battle_of_Nasiriyah
 |
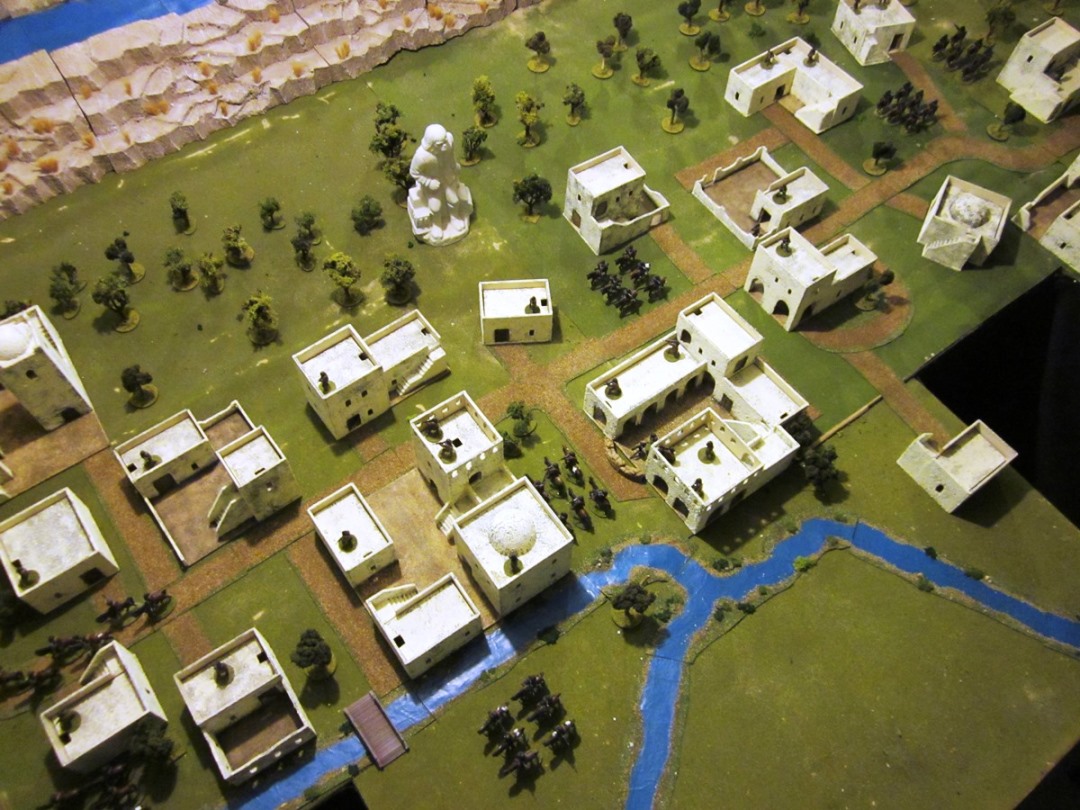
| The city is a mix of custom built terrain from various makers. The roads are also custom made. The rivers are from Wargammers Terrain. Some of the buildings were made by Art of War Terrain. | | |
|
 |
| I am using Battlefield Evolution miniatures currently. They are not the greatest figures and are in 25mm scale. I have a few 20mm vehicles that work good with them as far as scale. Eventually I plan on either replacing them all with 28mm scale "metal" figures, but for now they work good for me. The Iraqi's for the most part in the entire Operation Iraqi Freedom, removed all uniforms and blended in with the civilians. |
 |
| An Iraqi Tunguska in position near Saddam Canal Bridge. |
 |
| 1/2 forward recon calls in artillery strikes and air support against Iraqi T-55 tanks and dug in Iraqi armored infantry. |
 |
| Air support arrives at Nasiriyah and takes out remaining Iraqi armor. |
 |
| Air support near southern Hwy 7 bridge over the Euphrates River. Nothing like seeing Iraqi armor burning. |
|
|
 |
| Marines of Bravo Company 1/2 advancing towards the Euphrates River bridge. |
 |
| AAV of Bravo Company 1/2 taking a direct hit from an Iraqi RPG as Bravo Co begins to move towards the Euphrates River Bridge. |
 |
| Marines of Bravo Company 1/2 moving towards Euphrates River Bridge after their AAV had been hit by a RPG. |
 |
| Airstrike on west side of Hwy route 7 along "Ambush Alley" |
 |
| Charlie Company 1/2 heading down Hwy 7 towards Saddam Canal Bridge with tank support that arrived early from refueling. Bravo Company 1/2 took a lot of casualties crossing the bridge and has set up a parameter on the northern side of the Euphrates River Bridge but has cleared the first few blocks on the east side of Hwy 7 that paved the way for Charlie Company. |
 |
| Iraqi Tunguska ambushing Marine tanks in support of Charlie Company 1/2 |
 |
| Charlie Company 1/2 exited their AAV's and taking cover and heading east along Hwy 7 towards Saddam Canal Bridge. |
 |
| Marines of Charlie Co look on as their tank support is being seriously hit by Iraqi rockets from Iraqi armor. The first few city blocks have been taken and the Marines are half way to the Saddam Canal Bridge. |
 |
| Charlie Company 1/2 moving forward regardless of losses. |
 |
| Air Strike near Saddam Canal Bridge |
 |
| Tank support for Alpha Co 1/2 |
 |
| Alpha Co 1/2 nearing Saddam Canal Bridge |
 |
| Alpha Co 1/2 moving through Charlie Co positions |
 |
| Air Strike near Saddam Canal Bridge taking out Iraqi targets |
 |
| Alpha Co 1/2 moving toward Saddam Canal Bridge |
 |
| Alpha Co 1/2 taking the Saddam Canal Bridge |
|
The Marines of 1/2 secure both bridges and defeat the Iraqi army protecting Nasiriyah. The Marine casualties were 28 kills and the Iraqi took over 300 casualties.
The some of the terrain was made by Battlefield Architect and the rivers were made by Wargamer's Terrain. The desert buildings were a combination of Art of War terrain and Philip Viverito, and a custom set of terrain made from a member on Ebay named ironblood-mechanique.
http://www.wargamersterrain.com/
battlefield architect
http://www.artofwarterrain.com/