UPDATE!!!
I added some more detailed photos with my new camera. See Below!
Ever since I was a kid after visiting the Alamo in 1974 I became intrigued by the Battle of the Alamo. It is practically what started me into painting miniatures and war gaming. I remember seeing the Alamo Diorama in 1974 and was amazed by the detail, and I thought it would be very cool to be able to do that myself, so eventually in 1997 I tried my first Alamo diorama which was in 1/72 scale, but only 1/4 of the battle. I realized years later after it was falling apart that it was not historically correct, it was more modeled after the John Wayne movie, which I still love today.
So, I decided to destroy that diorama in 2013 and build a new one in 15mm but do the entire battle. I had made a custom coffee table with glass to display it in, which set me back about $1300, but worth every penny, the table was made by Z and S Wood works out of Missouri.
http://www.zstables.com/
I had the figures painted by ECA miniatures (1800), because I was very burned out from painting, and I was at the time painting about 1000 28mm figures. I can paint very well, but I needed help keeping my sanity.
http://ecaminis.com/
The figures were all mostly 15mm Blue Moon Texans and Mexicans, with about 400 dead mexicans from Musket Miniatures.
http://oldglory25s.com/
http://www.musketminiatures.com/
Once all of the figures were in and I finally finished up those 28mm minis I was painting, I painted the Alamo, with some help from my friends and their airbrushes, which saved me a lot of time. After a great base coat was put on, I washed and dry brushed the Alamo in to a very well detailed model. The Alamo was made by the nice folks at Old Glory 25's / Blue Moon manufacturing, along with majority of the miniatures used on the diorama.
The Alamo before being painted.
It took about 5 to 6 weeks to complete the diorama...and it turned out rather well, better than I expected. I put on about 5 or 6 layers of dry brushing, and then painted on the detail where needed. I glued the resin fort (made by Blue Moon / Old Glory 25's) down to the plywood using wood glue, I also took small wood screws and washers and secured the fort to the plywood. I turned the board upside down, and the Alamo...it never moved.
The longest part was gluing down 1400 miniatures on the diorama. (I kept 400 to use for war gaming with my Hudson and Allen Alamo that I have painted. 18mm works well with true 25mm scale buildings.
I tried to capture the final glory the Texans had in the battle, and not focus so much on the slaughter that came after. The date is March 6th, 1836 about 5:45 am or close to. The battle ended around 6:00 am or there about. I had them standing their ground outside of the long barracks before they pulled back into the fall back positions located inside of the long barracks. This area of the battle is where most of the vicious hand to hand combat took place.
The courtyard was a slight challenge since there is not much info on that part of the battle. I had them pulling back to their fall back positions that were in the long barracks.
For the guns in the chapel, I placed two, I could not get three in the chapel, without it looking odd.
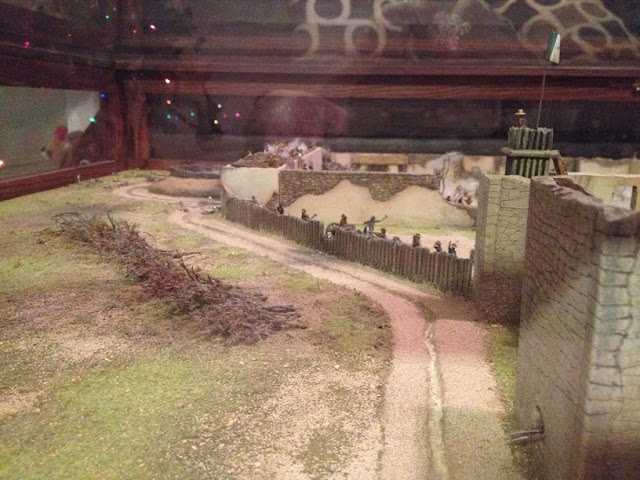
The corner of the long barracks looking west.
The model came with a nice lunette which was very detailed.
Me in my moment of glory near completion. At this point I am completely engulfed with the whole story of the Alamo battle.
In the final stages before the finale before carrying to the display table.
I used some steel eyelets screwed into the board of the diorama to lift the diorama into place in the coffee table. It was very rewarding to finally have my very own museum quality Battle of the Alamo in my living room finally after 39 years.
Both of my daughers will grow up knowing all about the Alamo, which all Texans should know about, along with Texas History.
The display table is 42" x 62" roughly. It is rather a big coffee table, but once you get used to it, it looks fantastic.
I may one day put some lights on the explosions, but that will require some drilling, and I am taking a break from projects for awhile. I also can add more detail to it, whenever I want. The good thing, it will remain clean and free of dust.
Now its time to buy some new furniture to go around it, one of the requirements that was put in place by my wife to even get this diorama in the living room.
This diorama will be in the news section of Wargames Illustrated issue 310 coming out in late July 2013. I have also sent pictures to the Daughters of the Republic of Texas as well as to the Alamo Historian working at the Alamo today.
For a good source of information about Texas History here are some good links.


1 comment:
Awsome diorama! Maybe the best I have ever seen. I am out of words sir.Congratulations. The effect with the smoke gives a sense of reality to the whole scenery. But you have also captured the moment of the final assault and the right amount of figures at the right point...
Post a Comment