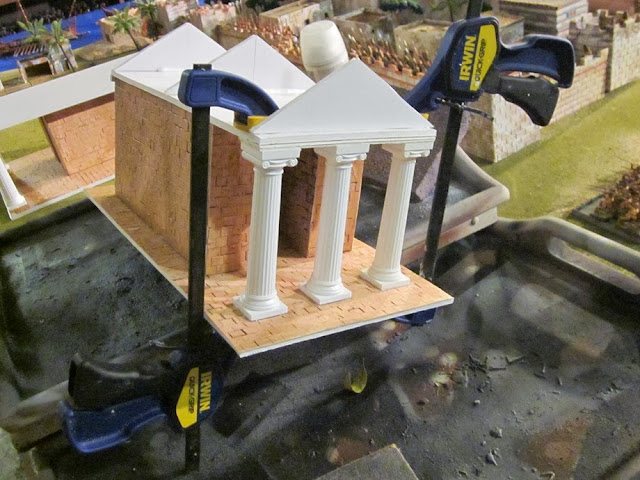
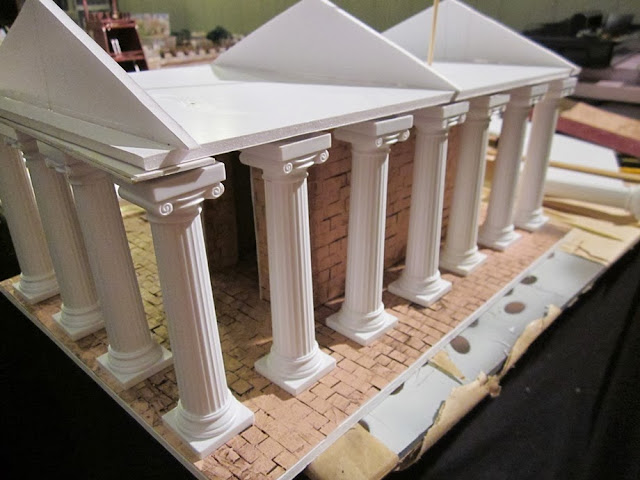
 I have a bunch of terrain, mostly for Greeks, but I have no Greek Temples or Palaces. I decided to build my own finally. Let me tell you, it is a lot of work. My first mistake was buying 1 inch pink board, its too thick, but they sell it in 2' squares, so I was enticed that I could just load it up in my cab of my car and not have to cut a sheet of 1/2" pink board up in the store after buying it, plus I did not need a 8' x 4' sheet of pink board. ( It was raining too). Anyways, I made plans on the drawing board, and cut everything out, and the structure was just way too big, too big for 28mm scale. So I started over. I had some extra Precision Plastic brick sheets laying around that I got from Philip Viverito when I got Carthage in the mail, so I eventually came up with a plan...I think it is turning out rather well, but a lot of math involved.
I used some wedding 5" Roman columns, which turned out to work well also. I still used the thick pink board, but you can't tell, after awhile. Still have a lot to do, the roofs are next. I am waiting on some Spanish Tiles for the roofs.
Part 1
 |
| Eventually everything will be painted black, then grey, then dry brushed with a flat white (house paint), then dry brushed again with a antique white, with the roofs being painted with a russet red and then dry brushed with a Terra Cotta paint. |
Part 2
I got half of the Spanish tile roofs in, and all of the columns. I decided to start experimenting paint jobs on the smallest temple. I did some research on Greek Temples and found that they were painted up extravagantly. I am still trying to figure out how to dry brush the columns better. I start with black.
Part 3
Finished painting the first temple, minus the roof. The pitch of the first temple is slightly higher than I realized, but it still looks good once you put the roof on it. So I am still debating about replacing the trident on the small temple. Meanwhile I have started on the next 2, the large temples. A lot more work ahead.
Part 4
Trident and Columns finished, Temples painted....but still working on the roofs. One picture has the roof on it, but not glued or anything, I just sat it on top to see what it looked like. It will obviously be drybrushed as well. That is next. Plus I am waiting on some back ordered roofs.
Part 5
I got the first Temple finished, because I only had one roof. I am waiting on the others. It was my very first ever roof, so I learned some stuff, before the next two. After getting the roof on I dry brushed the roof. This took some time, it turns out the ruddy brown primer I used was so close to the Terra Cotta paint I had, you could not tell the difference. The last time I used a dark brown and then the Terra Cotta. This time, it took a few different tries, but I finally used a mix of brown and yellow and dry brushed the roof and it came out as good as it was going to get. I almost decided to wash the roof, but changed my mind. I didn't want to wait. Anyways, one down 2 to go. I used some old Hinchliffe 25mm Greeks for painted statues.
Part 6
I finished the 2nd Temple finally. I have one left. I have some new roofing in, but it is only 12" long x 7.5 inch wide per panel, I need the Precision Product one that I also order because they come in 15" x 7.5" which fit perfectly. I may have a little more overhang than I need, but it still works. I am not perfect, and I don't expect my models to be perfect. I do not have to live in them. Now all I need is to buy some civilian figures for my Greek cities. It never ends.
 |
| I was going to repaint my Grand Manner Temple, but I said naah. But since I am waiting on some roofing, and have nothing to do, I may just do that. I am not ready to start this game currently. But I do think it does need some color, My quick paint job on it, seems boring now. I like the detail of the Grand Manner, but I also like my models. |
 |
| Carthage is starting to look more balanced now, being that I am adding large Temples and Palaces to it. Three or Four workout well for this. I made these temple for any city, Rome, etc. And I know I made a Temple with Alexander the Great on it, and they are being attacked by Macedonia. But I just had to drop it in anyway. Who knows maybe they worshiped him, and got betrayed....whatever fits. |
Part 7
Finally finished the 3rd Temple, and rebuilt the 2nd Temple roof. I did not like the out come of the 2nd Temple roof, it was a little short. Finished with everything and I am fixing to finally start the game on my table, after one more project is finished.
 |
| The glue is not completely dry in these photos, it dries clear eventually. |
 |
| I used Plastruct for the roofs on this one and the 2nd one. I used Precision Products for the first roof, but they are hard to find. And as soon as I finish it, they come in. Oh well, one can not have too much spanish tile on hand. |
 |
| Can you tell where I added roof. I think I did a great job of extending the roof. I did not like the first roof. |


